I have perfected a unique take on Garlic Dill Pickles using 4 cups water, 4 cups white distilled vinegar, fresh dill heads, garlic, and a pinch of kosher salt mixed with mustard seeds and peppercorns. Each bite offers an unexpected burst of crisp, tangy flavor that keeps you curious for more.
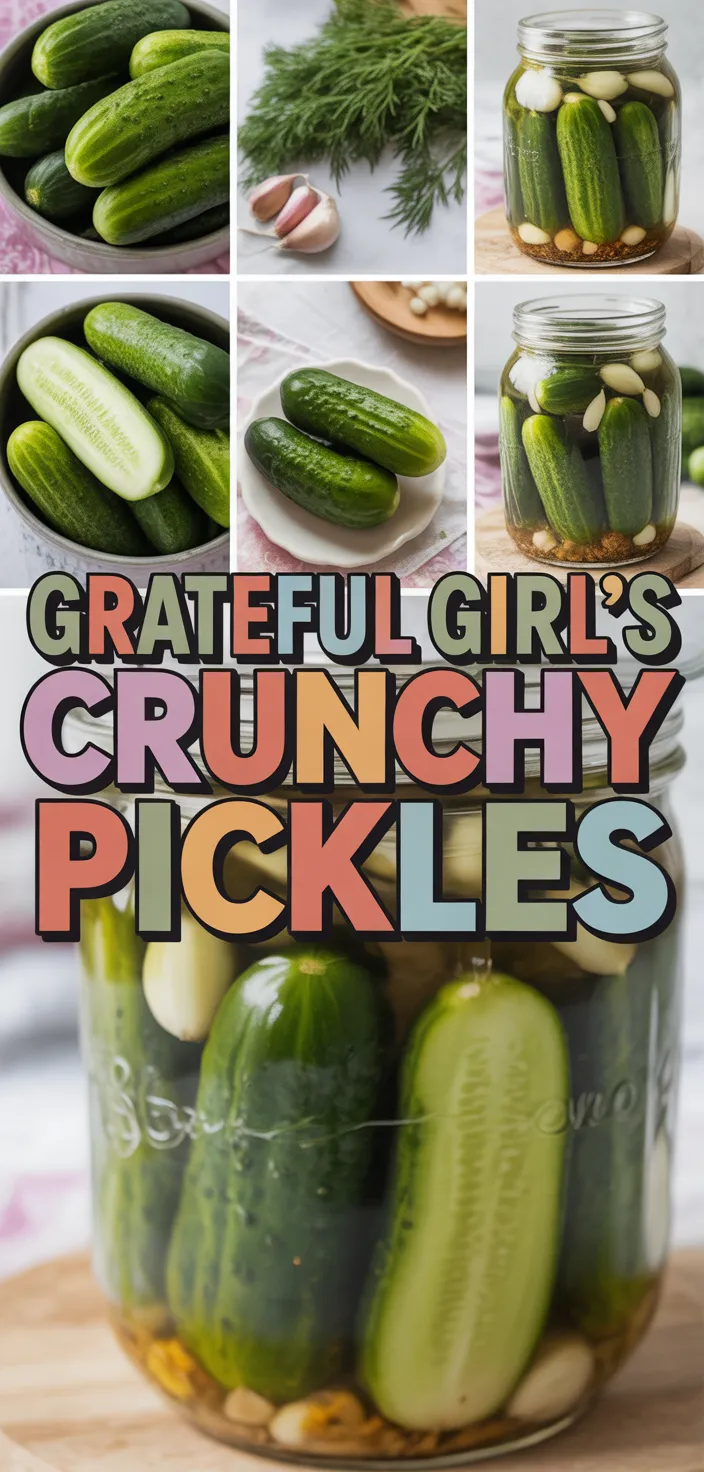
I love experimenting with classic recipes that let you capture summer’s bounty in a jar. Recently, I whipped up a batch of Crunchy Garlic Dill Pickles that turned out amazing.
I began with 4 cups water, 4 cups white distilled vinegar, and 3/4 cup kosher salt, then tossed in about 2 pounds of small pickling cucumbers that had been thoroughly cleaned and trimmed. The magic happened when I added 12 garlic cloves and 4 fresh dill heads.
I couldn’t leave out a tablespoon of yellow mustard seeds and a teaspoon of black peppercorns, and if you’re feeling brave, toss in a half teaspoon of red pepper flakes for a hint of heat. I sometimes think about how it’s like a homemade twist on the traditional canning pickles method and I really think youll enjoy this flavorful take on dill pickles.
It’s simple, crunchy and oh-so-tasty. Enjoy making these at home!
Why I Like this Recipe
I like this recipe because it gives me a really tangy flavor that reminds me of summer days and good times around the kitchen. I love how the mix of vinegar, salt, garlic and dill comes together to make each bite crunchy and satisfying. I also dig that I can adjust the heat with red pepper flakes if im in the mood for a little extra kick, making it feel more personal. Finally, I appreciate the whole water bath method even though it might seem a bit old-fashioned sometimes, because it makes the process feel like I’m preserving a little bit of history while getting a tasty snack.
Ingredients
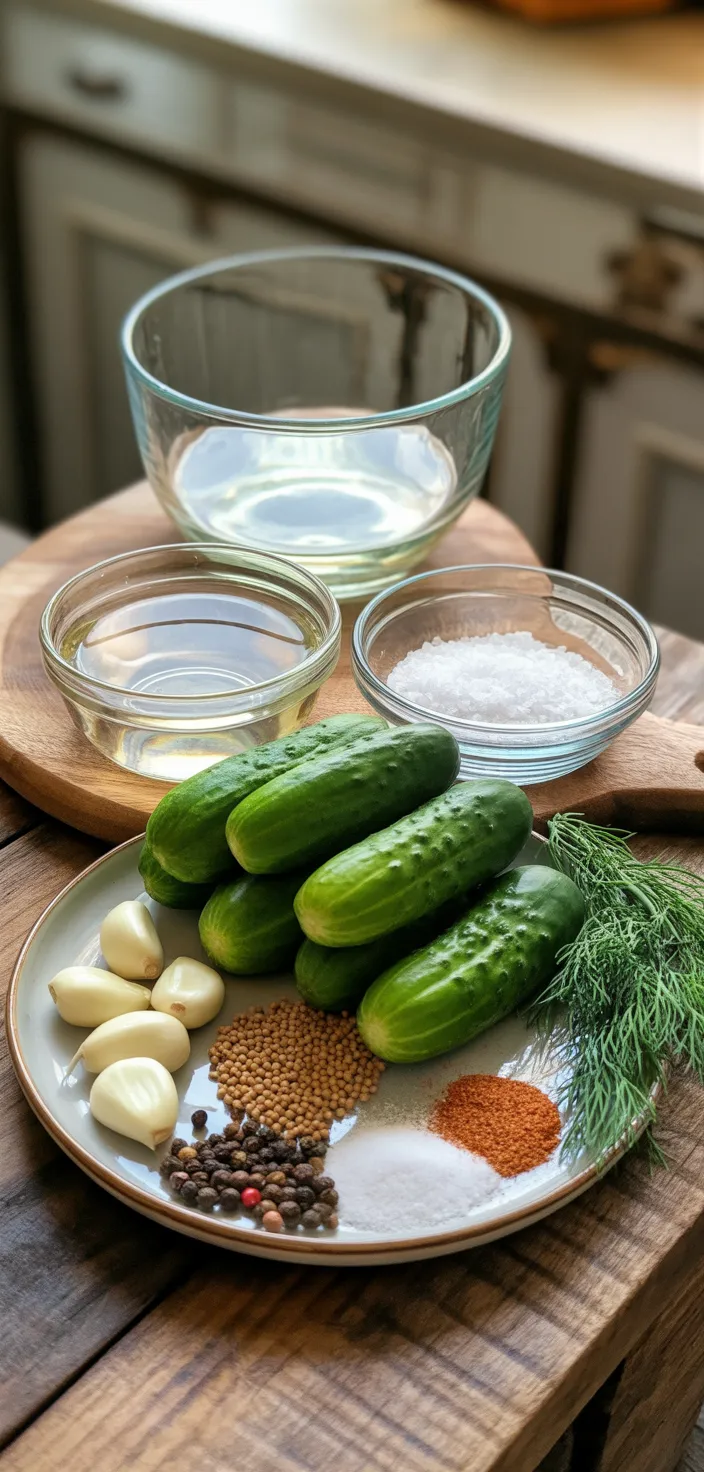
- 4 cups water – acts as a base that dissolves salt and keeps pickles balanced.
- 4 cups white distilled vinegar – offers a sharp sour taste, preserving and crisping pickles.
- 3/4 cup kosher salt – draws out cucumber juices and boosts overall flavor.
- About 2 pounds small cucumbers – offer crunch, fiber, and a refreshing, low-calorie bite.
- 12 garlic cloves – bring a bold, tangy flavor and extra healthy antioxidants.
- 4 fresh dill heads – add herbaceous notes, lightly seasoning and brightening the pickles.
- 1 tablespoon yellow mustard seeds – inject mild heat and a nutty, spicy twist.
Ingredient Quantities
- 4 cups water
- 4 cups white distilled vinegar
- 3/4 cup kosher or pickling salt
- About 2 pounds of small pickling cucumbers, cleaned and trimmed
- 12 garlic cloves, peeled
- 4 fresh dill heads (or large sprigs if you prefer)
- 1 tablespoon yellow mustard seeds
- 1 teaspoon black peppercorns
- Optional: 1/2 teaspoon red pepper flakes if you want a little heat
How to Make this
1. First, wash your jars and lids really well in hot soapy water then rinse them out to get rid of any residue.
2. Prep your cucumbers by cleaning them and trimming off the ends. Don’t worry about slicing them if you like whole pickles.
3. In a large pot, mix 4 cups water, 4 cups vinegar and 3/4 cup kosher salt. Bring the mixture to a boil and stir until the salt dissolves.
4. While the brine is heating, pack your sterilized jars with about 2 pounds of cucumbers, then add 12 garlic cloves, 4 dill heads (or sprigs you prefer), 1 tablespoon mustard seeds and 1 teaspoon peppercorns into each jar. If you like a little heat, sprinkle in 1/2 teaspoon red pepper flakes.
5. Once the brine has reached a boil, carefully pour it over the vegetables in each jar, making sure everything is totally covered.
6. Leave a bit of headspace at the top of each jar (about 1/2 inch) and then use a clean utensil to remove any air bubbles by gently tapping the jar on the countertop.
7. Wipe the rims of the jars with a clean cloth and screw the lids on firmly.
8. To use the water bath method, place the jars in a large pot of boiling water ensuring they’re covered by at least an inch of water.
9. Let the jars process in the boiling water for about 10 minutes then carefully remove them using jar lifters.
10. Set the jars on a towel and let them cool undisturbed for 12 to 24 hours. Once cooled, check that the lids have sealed. Store your pickles in a cool dark place and let them sit for at least a week before enjoying their crunch and tang.
Equipment Needed
1. Sterilized glass jars with lids
2. A large pot for boiling the brine
3. A cutting board
4. A sharp knife
5. Measuring cups and spoons
6. A utensil (like a spatula or chopstick) to remove air bubbles
7. A jar lifter
8. A clean cloth or towel for wiping jar rims
9. Another pot or large container for the water bath method
FAQ
Crunchy Garlic Dill Pickles / The Grateful Girl Cooks! Recipe Substitutions and Variations
- If you dont have white distilled vinegar, you can use apple cider vinegar or even red wine vinegar for a similar tangy flavor.
- If kosher or pickling salt is not available, try using sea salt or table salt but use a bit less since they are stronger.
- If you cant find small pickling cucumbers, you can chop up regular cucumbers. They might not be as crunchy though.
- If fresh dill heads are missing, dried dill can work. Just use less because dried herbs are more intense.
- If you dont have red pepper flakes but want some heat, consider using a few slices of a fresh chili pepper.
Pro Tips
1. Make sure your jars are super clean by washing them in really hot soapy water and then rinsing well. It helps a lot if u let ’em air dry before you pack in the cucumbers and other goodies so that any leftover water doesn’t mess with the pickling process.
2. Once you fill up the jars, try not to rush removing the air bubbles. Using a clean spatula or even a chopstick to tap around the sides can really help get rid of pockets, which is important for a good seal and flavor.
3. For extra crunch, consider sneaking in a grape leaf or two if you got ‘em. People swear it helps maintain crispness even when the pickles sit for a long time.
4. Label your jars with the date and any little tweaks u might have made. This way u can keep track of how long they’ve been pickling and also remember what worked best for next time, so u can tweak your recipe even if it’s already awesome.
Crunchy Garlic Dill Pickles / The Grateful Girl Cooks! Recipe
My favorite Crunchy Garlic Dill Pickles / The Grateful Girl Cooks! Recipe
Equipment Needed:
1. Sterilized glass jars with lids
2. A large pot for boiling the brine
3. A cutting board
4. A sharp knife
5. Measuring cups and spoons
6. A utensil (like a spatula or chopstick) to remove air bubbles
7. A jar lifter
8. A clean cloth or towel for wiping jar rims
9. Another pot or large container for the water bath method
Ingredients:
- 4 cups water
- 4 cups white distilled vinegar
- 3/4 cup kosher or pickling salt
- About 2 pounds of small pickling cucumbers, cleaned and trimmed
- 12 garlic cloves, peeled
- 4 fresh dill heads (or large sprigs if you prefer)
- 1 tablespoon yellow mustard seeds
- 1 teaspoon black peppercorns
- Optional: 1/2 teaspoon red pepper flakes if you want a little heat
Instructions:
1. First, wash your jars and lids really well in hot soapy water then rinse them out to get rid of any residue.
2. Prep your cucumbers by cleaning them and trimming off the ends. Don’t worry about slicing them if you like whole pickles.
3. In a large pot, mix 4 cups water, 4 cups vinegar and 3/4 cup kosher salt. Bring the mixture to a boil and stir until the salt dissolves.
4. While the brine is heating, pack your sterilized jars with about 2 pounds of cucumbers, then add 12 garlic cloves, 4 dill heads (or sprigs you prefer), 1 tablespoon mustard seeds and 1 teaspoon peppercorns into each jar. If you like a little heat, sprinkle in 1/2 teaspoon red pepper flakes.
5. Once the brine has reached a boil, carefully pour it over the vegetables in each jar, making sure everything is totally covered.
6. Leave a bit of headspace at the top of each jar (about 1/2 inch) and then use a clean utensil to remove any air bubbles by gently tapping the jar on the countertop.
7. Wipe the rims of the jars with a clean cloth and screw the lids on firmly.
8. To use the water bath method, place the jars in a large pot of boiling water ensuring they’re covered by at least an inch of water.
9. Let the jars process in the boiling water for about 10 minutes then carefully remove them using jar lifters.
10. Set the jars on a towel and let them cool undisturbed for 12 to 24 hours. Once cooled, check that the lids have sealed. Store your pickles in a cool dark place and let them sit for at least a week before enjoying their crunch and tang.